
How to Frame a Drywall Soffit Box Around Low-Hanging Steel Main Beams
Successfully framing a drywall soffit box around low-hanging steel main beams is a common challenge during basement renovations or open-concept floor plan projects. These structural elements often dictate the final ceiling height and require careful planning to ensure the finish remains level and visually appealing.
By using the right materials, such as galvanized steel studs or dimensional lumber, you can create a clean, professional aesthetic that integrates the beam into your home’s architecture. This process involves precise measurements, proper attachment methods, and attention to fire-safety codes, ensuring that your structural encasement is both functional and durable for years to come.
Planning and Initial Measurements
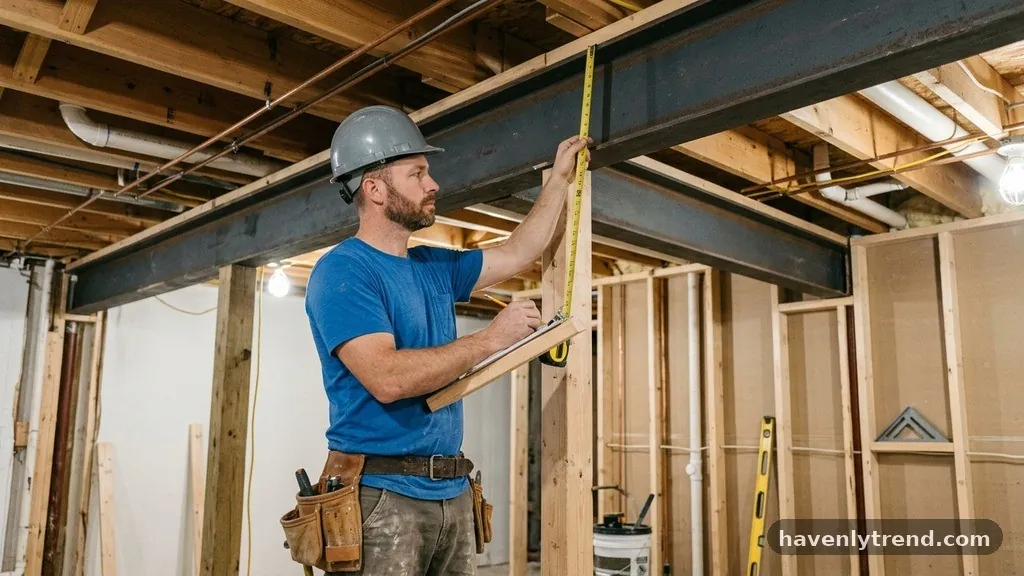
Before you begin framing, you must establish the exact dimensions of your steel I-beam. Use a laser level to project a straight line across the surrounding ceiling joists, which will serve as your guide for the bottom of the soffit.
If you do not have a laser level, a high-quality chalk line remains the industry standard for marking long, straight runs. You need to account for the thickness of your drywall—typically 1/2 inch or 5/8 inch—plus a small margin for error to ensure the finished box remains perfectly plumb.
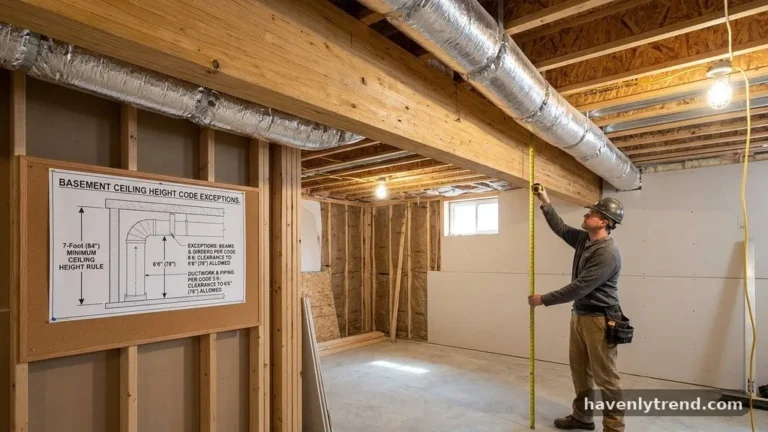
Consider the total ceiling height available after the box is built. If your steel I-beam is particularly low, you might be tempted to build the box as tight as possible to the steel. However, you must leave enough room for any necessary wiring, plumbing, or HVAC ductwork that might also be running alongside the beam.
Always check the local building codes regarding fire-rated drywall requirements if the beam is part of a primary structural load-bearing system. A clear plan prevents costly mistakes and ensures the soffit looks intentional rather than like an afterthought.
Essential Tools and Material Selection
Selecting the right materials for framing a drywall soffit box around low-hanging steel main beams is critical for structural stability. While traditional wood framing is common, many professionals now prefer galvanized steel studs because they are lightweight, perfectly straight, and resistant to warping or rot.
If you choose wood, ensure the lumber is kiln-dried to prevent the framing from twisting as it cures. You will also need an impact driver for quick and secure fastening, especially when driving screws into metal or dense wood blocking.
Recommended Hardware and Supplies
* Galvanized steel studs or 2×4 framing lumber.
* 1-1/4 inch drywall screws for attaching board to framing.
* Self-tapping screws for fastening steel studs to the beam or joists.
* Corner bead to protect and define the finished edges.
* Acoustic insulation to minimize noise transfer from the steel beam.
* Joint compound and paper tape for finishing the seams.
Always verify that your fasteners are compatible with the material you are drilling into. For instance, attaching steel framing to a heavy steel I-beam often requires specialized self-tapping metal screws or even a powder-actuated tool.
If you are uncertain about the load-bearing requirements of your specific installation, consult the International Code Council for guidelines on structural modifications and fire safety. Proper material selection ensures that your soffit remains rigid and free of cracks over time.
Establishing the Layout and Perimeter

The layout phase is where you translate your measurements into a physical framework. Start by marking the perimeter of the soffit on the ceiling joists, ensuring the lines are parallel to the beam.
If the beam is not perfectly centered in the room, you may need to adjust the soffit width to maintain visual symmetry. Use a plumb line to drop a mark from the ceiling to the floor, ensuring your vertical framing members will be perfectly aligned.
Once the perimeter is marked, install the top track or wall plate along the ceiling. This component acts as the anchor for the rest of your structure. Secure it firmly into the joists using long screws to ensure the weight of the drywall and the framing is supported.
If you are working with an existing finished ceiling, you must locate the joists carefully to avoid hitting wires or pipes. Precision at this stage is the difference between a professional-looking finish and a wavy, uneven ceiling.
Building the Vertical and Horizontal Structure
With the top plates secured, you can begin installing the vertical members or “hangers” that define the height of your soffit. These pieces should be cut to a uniform length to ensure the bottom of the box is perfectly level.
If you are using steel studs, remember to nest them within the top track and secure them with pan-head screws. If you are using wood, consider using a simple jig to cut all your studs to the exact same length, which saves time and improves accuracy.
The bottom horizontal framing members, often called the “bottom plate,” connect the vertical studs to create the underside of the soffit box. Once these are installed, you have a solid, three-dimensional frame ready for drywall installation. Check for level one final time before moving on to the next step.
If you notice any slight deviations, now is the time to shim or adjust the framing. A solid, square frame is the foundation for a smooth, crack-free drywall finish.
Managing Ductwork and Obstructions
Often, a steel I-beam is accompanied by HVAC ductwork or electrical conduit that must be hidden within the same soffit. When planning your framing, you must account for the necessary ductwork clearance to avoid crushing or kinking the pipes.
If the ductwork hangs lower than the steel beam, your soffit will naturally need to be larger to accommodate both. This often results in a “stepped” or wider soffit design that can actually add architectural interest to a basement.
Consider installing vibration dampening material between the ductwork and the framing to prevent rattling or noise transfer. If you have limited space, you might need to use rigid foam board or thin-profile furring channels to gain an extra fraction of an inch.
Always prioritize the function of the HVAC system over the aesthetic of the soffit; airflow is essential for the comfort of the space. Document the location of any hidden junction boxes or valves before you close up the wall, as you may need access to them in the future.
Comparing Framing Materials

Choosing between wood and steel depends on your comfort level with different tools and the specific requirements of your space. The following table highlights the primary differences between these common framing choices:
| Feature | Dimensional Lumber | Galvanized Steel Studs |
|---|---|---|
| Stability | Can warp or shrink | Remains perfectly straight |
| Weight | Heavier | Lightweight and easy to handle |
| Cutting | Requires miter saw | Requires tin snips or metal saw |
| Cost | Generally lower | Moderately higher |
| Installation | Standard wood screws | Requires specialized fasteners |
Steel studs are often preferred in damp environments like basements because they do not rot or support mold growth. However, wood is easier to work with if you are not experienced with metal framing tools. Evaluate your project needs and budget to determine which material provides the best outcome for your specific soffit design.
Installing Drywall and Corner Beads
Once the frame is complete, it is time to hang the drywall. Start with the sides of the soffit, cutting the boards to fit snugly against the ceiling. Next, install the bottom piece, ensuring it is flush with the side panels.
Use high-quality drywall screws every 8 to 12 inches along the studs to prevent any future sagging. If you are working with a long run, use a drywall lift to support the heavy boards while you fasten them.
After the boards are hung, the most important step for a sharp look is the application of corner bead. Metal or vinyl corner beads provide the crisp, straight edge that makes a soffit look like part of the original construction.
Nail or staple the corner bead securely to the framing, ensuring it is perfectly straight. If the bead is crooked, your finished soffit will look uneven regardless of how well you taped and mudded the joints.
Taping and Finishing Techniques
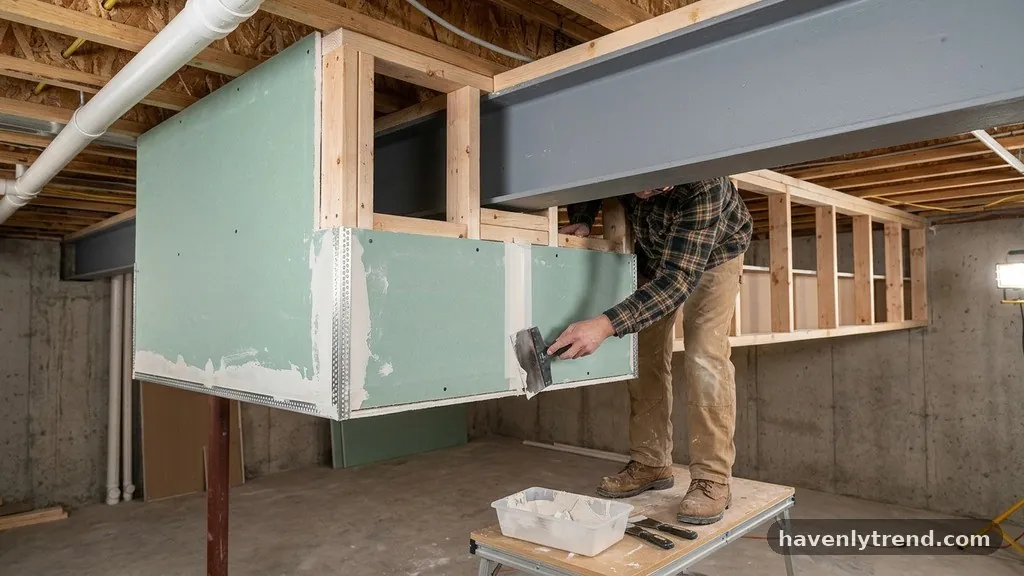
Finishing is where the skill of the installer truly shines. Begin by applying a layer of joint compound to the corners and seams, then press the paper tape into the wet mud.
Smooth it out with a taping knife, removing any excess compound to avoid creating a thick, uneven hump. Once the tape is dry, apply a second and third coat of compound, feathering the edges out wide to make the seams invisible.
After the final coat is dry, sand the surface until it is perfectly smooth. A pole sander is useful for the long horizontal runs of a soffit, while a hand block works best for the corners.
Check your work under a bright light held at an angle to reveal any imperfections or high spots. A well-finished soffit should look like a seamless extension of the ceiling once it is primed and painted.
Acoustic and Fire Considerations
If the steel I-beam is a structural load-bearing member, your local codes may require fire-rated drywall to protect the integrity of the beam during a fire. Always verify these requirements with your local building department before purchasing materials.
Beyond fire safety, consider adding acoustic insulation inside the soffit box. This helps dampen sound transmission, which is particularly beneficial if the soffit runs through a bedroom or living area.
Even a small amount of batt insulation can significantly reduce the “hollow” sound that often occurs with large soffit boxes. Ensure the insulation does not interfere with any electrical wiring or cause overheating in light fixtures.
By treating the soffit as a functional part of the building envelope rather than just a cosmetic cover, you improve the overall quality and comfort of the room. This extra step is often what separates a basic DIY job from a professional-grade renovation.
Common Questions About Soffits
How do I ensure the soffit is perfectly square?
Use a framing square to check every corner as you build the structure. You can also measure diagonally from corner to corner; if the measurements are identical, the frame is square.
Can I mount heavy items to the soffit box?
Generally, no. A soffit is designed to support its own weight and the drywall, not heavy shelving or lighting fixtures. If you need to hang something heavy, ensure you have reinforced backing inside the framing.
What is the best way to handle corners on a soffit?
Use high-quality metal or vinyl corner bead. This provides a durable, straight edge that resists impact and creates a professional finish that is easy to paint.
How do I finish the transition between the soffit and the wall?
Use standard corner tape or a decorative crown molding to cover the gap. A clean bead of caulk along the wall-to-soffit joint can also provide a finished, professional look.
Do I need to leave access panels?
If your soffit hides plumbing shut-off valves, junction boxes, or ductwork dampers, you should install a discreet access panel. This avoids the need to tear down the drywall if you ever need to perform repairs.
Refining Your Structural Encasement
Framing a drywall soffit box around low-hanging steel main beams is a transformative project that significantly cleans up the look of any space. By focusing on precise measurements, choosing the right framing materials, and taking the time to finish the drywall properly, you can turn an unsightly structural necessity into a polished architectural feature. Remember to verify all local building codes, especially regarding fire resistance and electrical access, before you finalize your design.
With a methodical approach and attention to detail, your finished soffit will provide a clean, professional aesthetic that lasts for years. Take your time during the framing phase, and don’t hesitate to use a laser level to keep everything perfectly plumb. With the right preparation, your next home renovation project will be a success.