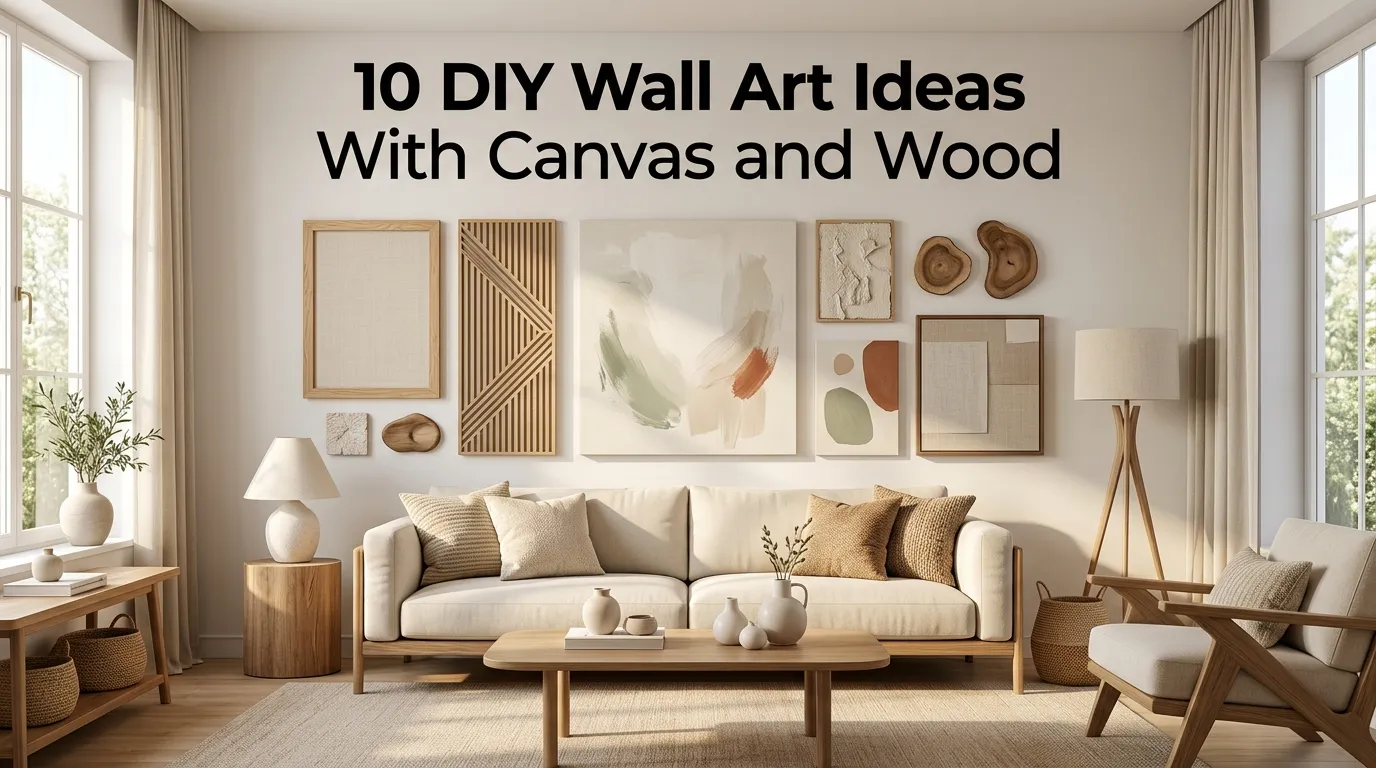
10 DIY Wall Art Ideas With Canvas and Wood
Blank walls can make even a beautifully furnished room feel unfinished. The good news is that you don’t need expensive artwork or complicated tools to give those walls personality. Canvas and wood are two of the easiest materials to work with, and together they can create surprisingly polished pieces that look right at home in living rooms, bedrooms, hallways, offices, and entryways.
One thing I love about DIY wall art is the freedom to make something that actually fits your space. Instead of searching for artwork that happens to match your sofa or bedroom colors, you can choose the canvas size, wood finish, colors, texture, and overall shape yourself. A simple abstract canvas can repeat the colors already in a room, while a wood-framed piece can add warmth to an otherwise neutral interior.
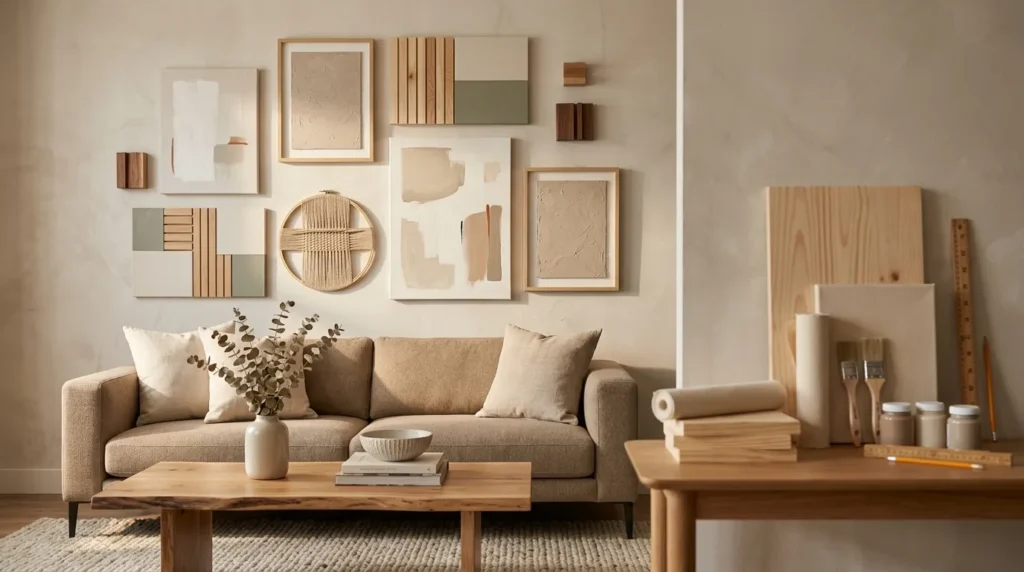
You also don’t need advanced woodworking skills for many of these projects. Simple pine boards, plywood, wood trim, dowels, and unfinished frames can become the foundation for beautiful wall decor with basic cutting, sanding, staining, painting, and assembly.
I’ve noticed that the most successful DIY wall art projects usually have one thing in common: they aren’t trying to do too much. A restrained color palette and simple composition can look more sophisticated than a complicated design covered in details.
These ideas range from minimalist canvas artwork and geometric wood designs to layered pieces that combine painted surfaces with natural grain. Some are ideal for beginners, while others are better suited to anyone comfortable using basic hand or power tools.
Before starting, measure your wall and think about scale. A large blank wall may need one substantial statement piece or a grouping of several coordinated artworks. Smaller spaces often look better with a single medium-sized piece.
Whether you’re decorating a new home, refreshing a room on a budget, or simply looking for a creative weekend project, these DIY wall art ideas can help you turn simple canvas and wood into decor that feels personal and intentionally designed.
Table of Contents
1. Framed Abstract Canvas
Combine a painted canvas with a simple wood frame for an elevated, gallery-style look.
2. Wood Slat Canvas
Add natural wood slats around or across a canvas to create warmth and dimension.
3. Geometric Wood Art
Create a modern statement piece with simple wooden shapes and a restrained color palette.
4. Painted Wood Panels
Turn inexpensive wood boards into a coordinated set of colorful wall panels.
5. Layered Canvas Art
Build visual depth by combining canvas, wood trim, paint, and overlapping shapes.
6. Rustic Wood Canvas Frame
Give a basic canvas a warm farmhouse-inspired frame using stained or weathered wood.
7. Minimal Line Art
Create simple, modern artwork using clean painted lines and a natural wood frame.
8. Botanical Canvas Board
Combine painted botanical shapes with a wooden backing for organic wall decor.
9. Textured Wood and Canvas
Mix contrasting textures to create artwork that feels tactile and handcrafted.
10. Oversized DIY Diptych
Create two coordinating canvas-and-wood panels for a dramatic large-wall statement.
1. Framed Abstract Canvas
Quick Benefits
- Beginner-friendly project
- Creates a custom focal point
- Easy to match to your decor
- Works in many rooms
- Looks more expensive with a wood frame
Why It Works
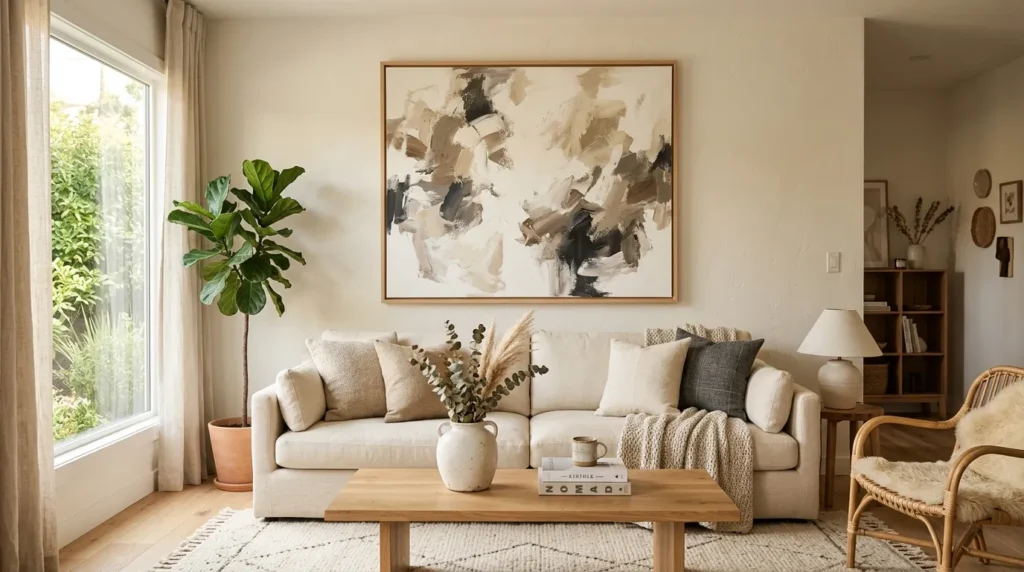
An abstract canvas is one of the easiest DIY wall art projects to personalize because there are very few rules. You don’t need to be able to draw realistically. Simple blocks of color, brushstrokes, curved shapes, or layered washes can create a sophisticated result.
Adding a wood frame takes the project one step further. The natural frame gives the painted canvas structure and introduces warmth, particularly in neutral rooms.
The most important element is the color palette. Choose two or three main colors that already appear in your room rather than introducing a completely unrelated combination.
A mistake many DIYers make is trying to fill every inch of the canvas. Leaving intentional areas of blank or lightly painted space can make the final piece look much more refined.
How To Style It
Start with a stretched canvas in a size proportional to your wall. Acrylic paint is an accessible option because it dries relatively quickly and works well for many decorative projects.
Create a simple composition using broad brushstrokes, curved forms, overlapping blocks, or subtle texture.
For a modern neutral room, try ivory, warm beige, taupe, muted brown, and charcoal. For a more colorful space, select one dominant shade and one or two supporting colors.
Once the canvas is completely dry, build a simple wood frame around it using straight boards or an unfinished canvas frame. Sand the wood before staining, painting, or leaving it natural.
Hang the artwork above a sofa, console, dresser, or bed, leaving enough visual space between the art and furniture.
2. Wood Slat Canvas
Quick Benefits
- Adds architectural texture
- Combines soft canvas with natural wood
- Creates a modern organic appearance
- Can be customized to any size
- Works well as a statement piece
Why It Works
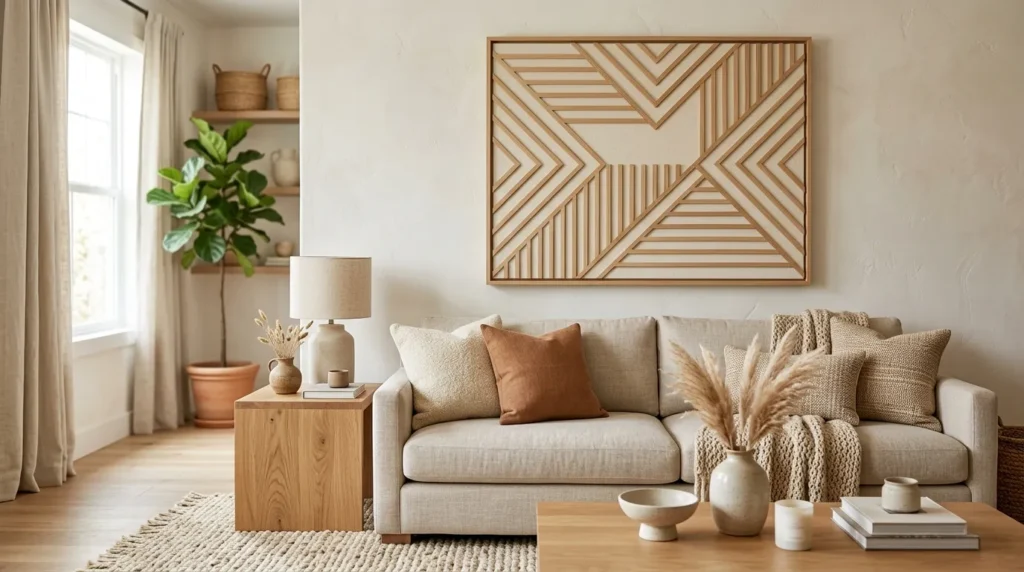
Canvas has a soft, flexible visual quality, while wood adds structure and warmth. Combining the two creates contrast, which is one reason this style of wall art can look more sophisticated than a simple painted canvas.
Thin wood slats can be arranged vertically, horizontally, diagonally, or in a simple repeating pattern. The canvas provides the background while the wood creates dimension.
This approach works particularly well with modern organic interiors where natural materials and neutral colors are important.
How To Style It
Choose thin, straight wood strips and sand them thoroughly before use. You can leave them natural, apply a light stain, or paint them depending on the style you’re after.
Paint the canvas first in a soft neutral shade. Warm white, cream, pale gray, or muted beige can provide a subtle backdrop.
Attach the wood slats in a clean pattern. Keep spacing consistent if you’re creating a geometric design.
For a more organic look, vary the direction or length of the pieces while maintaining an overall balanced composition.
Use wood tones that relate to existing furniture, flooring, or shelving.
Because this piece has physical depth, hang it where people can appreciate the texture without placing it in a high-traffic area where protruding elements could be bumped.
3. Geometric Wood Art
Quick Benefits
- Creates a modern focal point
- Uses simple materials
- Offers endless pattern possibilities
- Can be customized to your color scheme
- Works well in offices and living spaces
Why It Works
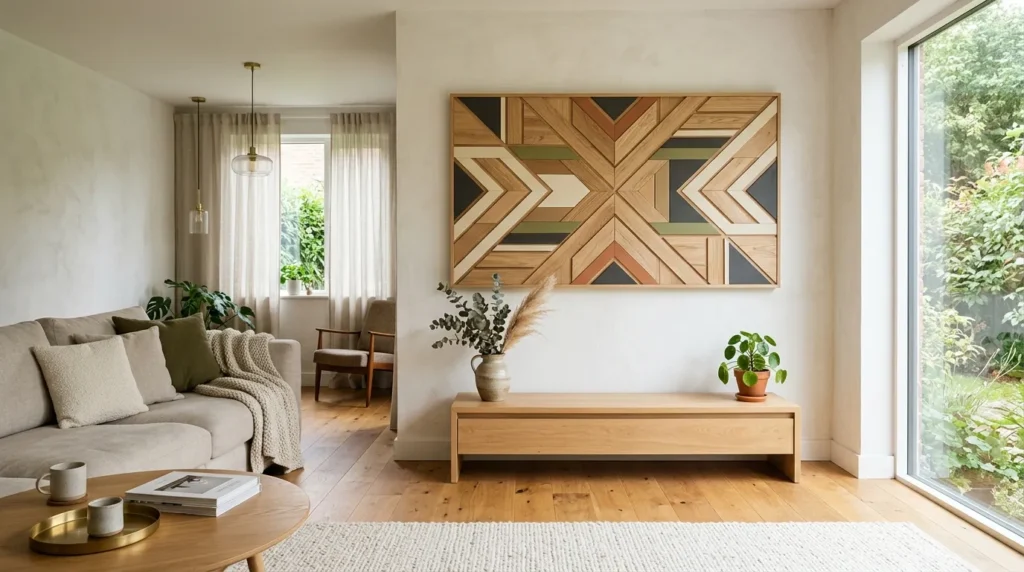
Geometric artwork can bring structure to a room without relying on complicated illustrations. Triangles, arches, rectangles, circles, and angled wood pieces can be arranged into patterns that feel contemporary and intentional.
Wood makes the project more interesting because the natural grain becomes part of the artwork.
You can create a completely neutral piece using several wood tones, or introduce painted sections for more contrast.
The secret is creating a clear visual rhythm. Repeating shapes or angles help the eye understand the composition.
How To Style It
Begin with a plywood or MDF backing board if you want a solid foundation. Sand the surface and edges before applying paint or wood pieces.
Sketch your design on paper first. This is particularly important when working with geometric patterns because small spacing differences can become noticeable.
Cut wood pieces to your desired shapes and sizes, then sand the edges.
Leave some pieces natural and paint others in one or two complementary colors. Black, cream, muted green, terracotta, and soft blue can all work beautifully with natural wood.
Attach the pieces using an adhesive appropriate for the materials and follow the manufacturer’s directions.
Use a simple frame or leave the edges clean for a contemporary appearance.
4. Painted Wood Panels
Quick Benefits
- Easy to create as a set
- Works well on large walls
- Can introduce controlled color
- Simple enough for beginners
- Easy to coordinate with existing decor
Why It Works
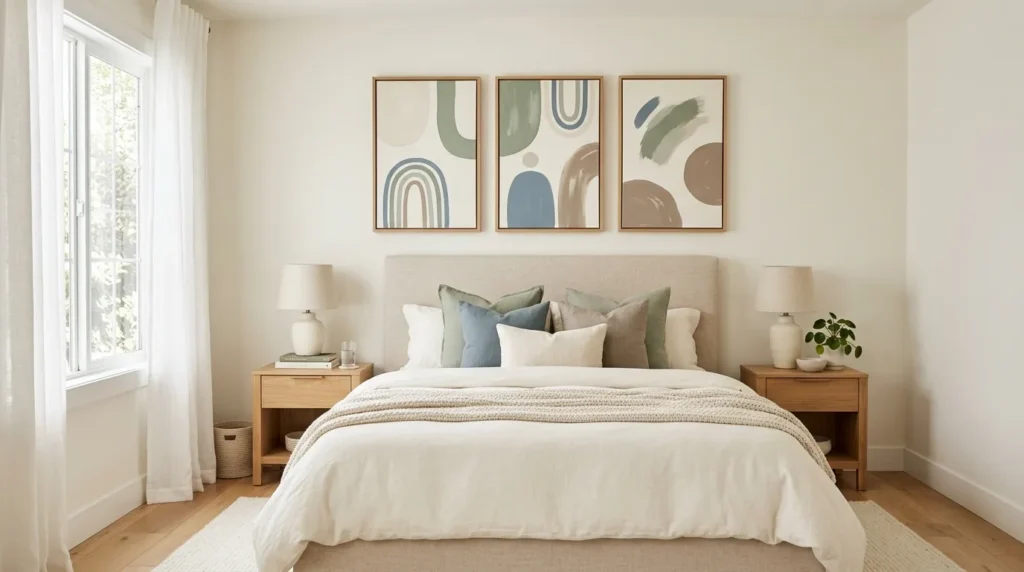
Sometimes the simplest artwork has the strongest effect. A set of painted wood panels can create a graphic arrangement without requiring advanced painting techniques.
The repetition of several panels creates cohesion, while different colors or patterns keep the grouping interesting.
This idea is particularly useful for large walls where one small piece would feel lost. Three or four coordinated panels can create enough visual weight without requiring one enormous artwork.
How To Style It
Cut or purchase several similarly sized wood boards. Sand the surfaces and prime them if needed.
Choose a palette based on the room. For a calm bedroom, try cream, sage, taupe, and dusty blue. For a contemporary living room, charcoal, beige, natural wood, and off-white can create a sophisticated combination.
You can keep the designs extremely simple. Try broad color blocks, arches, stripes, half circles, or abstract brushstrokes.
Arrange the panels with equal spacing for a clean modern look.
Alternatively, slightly vary the designs while maintaining the same palette for a more artistic appearance.
Mount the panels at eye level and make sure the overall grouping is proportional to the furniture beneath it.
5. Layered Canvas Art
Quick Benefits
- Creates physical depth
- Looks artistic and dimensional
- Allows multiple materials
- Can hide minor canvas imperfections
- Works as a statement piece
Why It Works
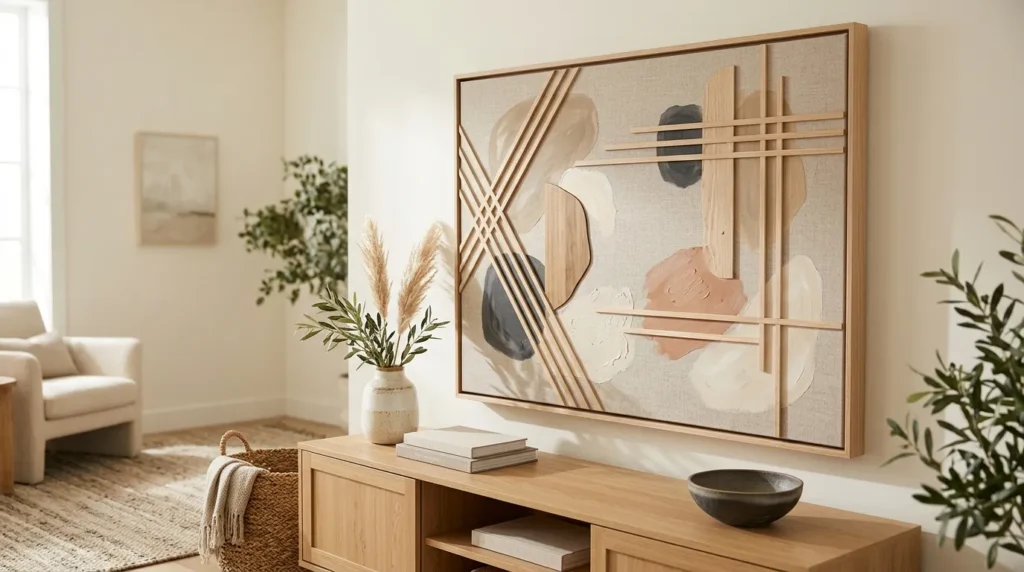
Layering different materials creates the impression of custom artwork without requiring complex painting skills. A canvas can serve as the base, while wood strips, painted shapes, fabric, or raised elements provide additional dimension.
The contrast between flat paint and physical materials gives the artwork more visual interest when viewed from different angles.
This approach is especially effective when you want wall art that feels handmade rather than mass-produced.
How To Style It
Begin with a stretched canvas in the desired size. Paint the background in a neutral or softly contrasting color.
Create a composition using thin wood strips, arches, circles, or simple cutout shapes.
You can paint some elements and leave others natural to emphasize the difference between color and wood grain.
Layer the pieces carefully rather than covering the entire surface. A few overlapping shapes can create enough depth.
Use a wood frame around the finished canvas if you want a more polished appearance.
Because the artwork is dimensional, keep the surrounding wall relatively simple. Let the piece become the focal point.
6. Rustic Wood Canvas Frame
Quick Benefits
- Adds warmth to simple artwork
- Easy way to upgrade an existing canvas
- Works with farmhouse interiors
- Uses inexpensive materials
- Can be stained or painted
Why It Works
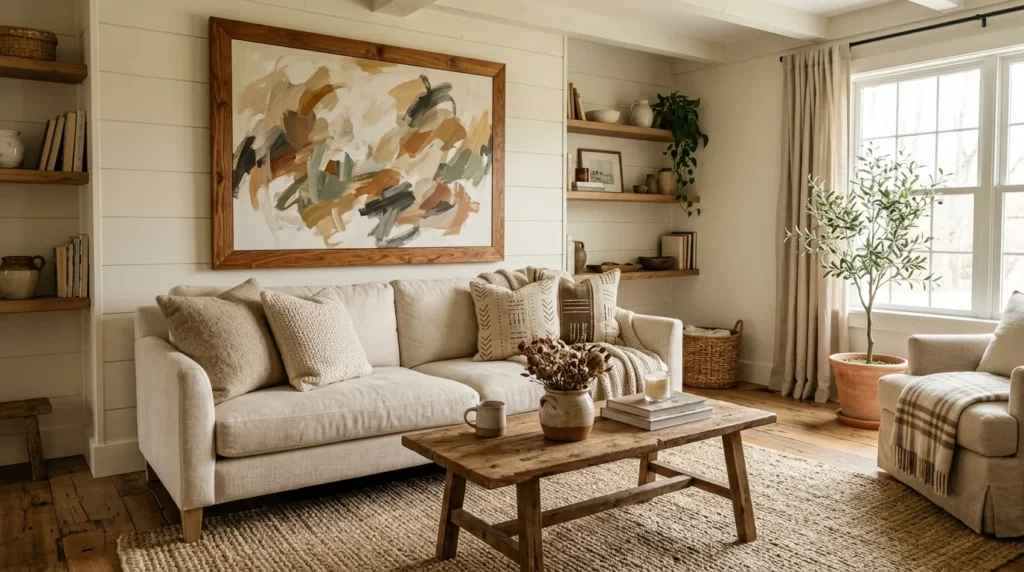
If you already have a canvas painting you like but it feels unfinished, a simple wood frame can completely change its appearance.
Rustic or lightly weathered wood works particularly well with farmhouse, cottage, French country, traditional, and warm modern interiors.
The frame creates a visual transition between the artwork and the wall, making the piece feel more substantial.
You don’t need heavily distressed wood to create the effect. A natural board with visible grain can provide enough character.
How To Style It
Choose straight wood boards that are appropriately sized for the canvas.
Sand the boards thoroughly and decide whether you want a natural, stained, painted, or lightly weathered finish.
For a farmhouse-inspired room, medium brown or warm gray can work well. For modern interiors, natural oak or a simple matte black frame may be more suitable.
Assemble the frame around the canvas, making sure the corners are secure and the finished structure is sturdy.
Use the framed canvas above a mantel, sofa, dresser, console, or dining bench.
If the artwork already contains strong colors, keep the wood finish relatively simple so the frame supports rather than competes with the painting.
7. Minimal Line Art
Quick Benefits
- Very beginner-friendly
- Creates a clean modern appearance
- Uses minimal materials
- Works well in neutral rooms
- Easy to customize
Why It Works
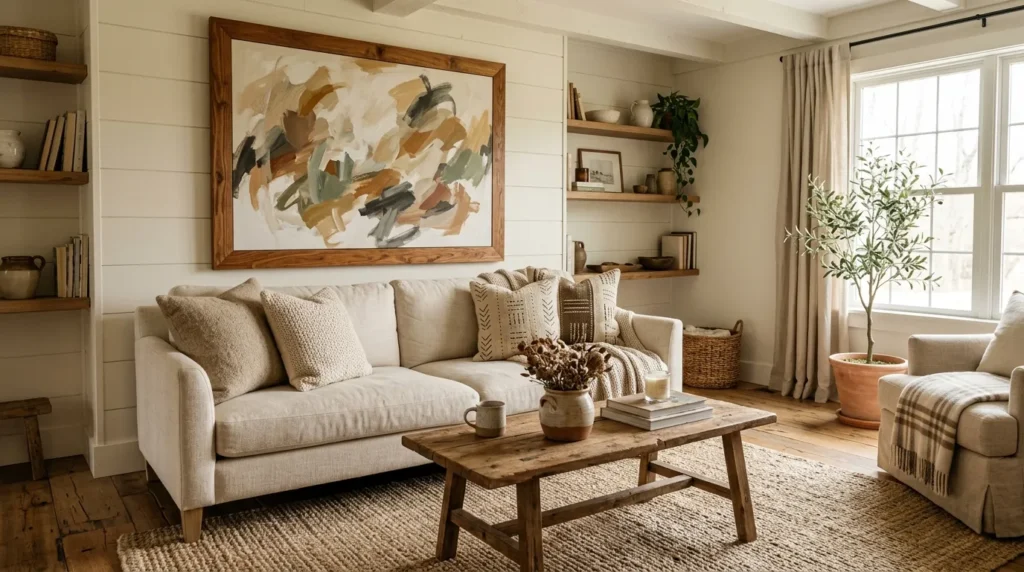
Minimal line art has become popular because it creates visual interest without overwhelming a room. You don’t need detailed artistic skills to make a simple continuous-line design, abstract face, botanical outline, or architectural sketch.
Canvas provides a clean background, while a natural wood frame adds warmth.
This style works especially well in bedrooms, home offices, hallways, and modern living rooms where you want artwork that supports the decor rather than dominating it.
How To Style It
Use a clean white, cream, or warm beige canvas as your base.
Sketch your design lightly with a pencil before applying paint. A fine black or dark brown brush can create the final line.
Keep the design simple. One continuous curve or recognizable botanical form can be more effective than a crowded illustration.
For a softer appearance, use dark brown or charcoal instead of pure black.
Frame the finished canvas in light natural wood.
For a gallery wall, create two or three related line-art pieces using the same frame finish.
8. Botanical Canvas Board
Quick Benefits
- Adds nature-inspired color
- Works with many decorating styles
- Easy to personalize
- Creates a fresh focal point
- Pairs naturally with wood
Why It Works
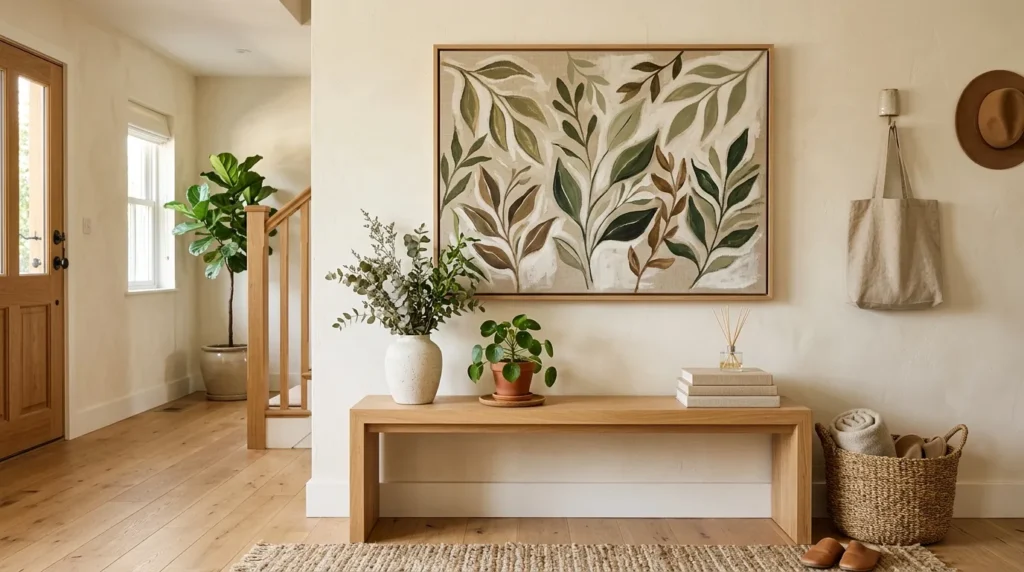
Botanical artwork brings a gentle connection to nature, making it particularly appropriate for bedrooms, kitchens, living rooms, and entryways.
You don’t need detailed botanical painting skills. Simplified leaves, branches, stems, and abstract plant shapes can create the same overall feeling.
The combination of painted greenery and natural wood is especially effective because the materials reinforce the subject matter.
How To Style It
Choose a warm neutral canvas background such as cream or light beige.
Sketch a simple botanical composition using leaves, branches, or stems.
Use muted green, olive, sage, or deep forest tones rather than extremely bright green for a more sophisticated result.
Add small touches of brown or terracotta if you want the artwork to feel warmer.
Mount the canvas onto a thin wood backing or frame it with natural wood.
Hang one large piece in a simple room or create a coordinated collection of three smaller botanical designs.
Keep the surrounding decor understated so the artwork remains the focal point.
9. Textured Wood and Canvas
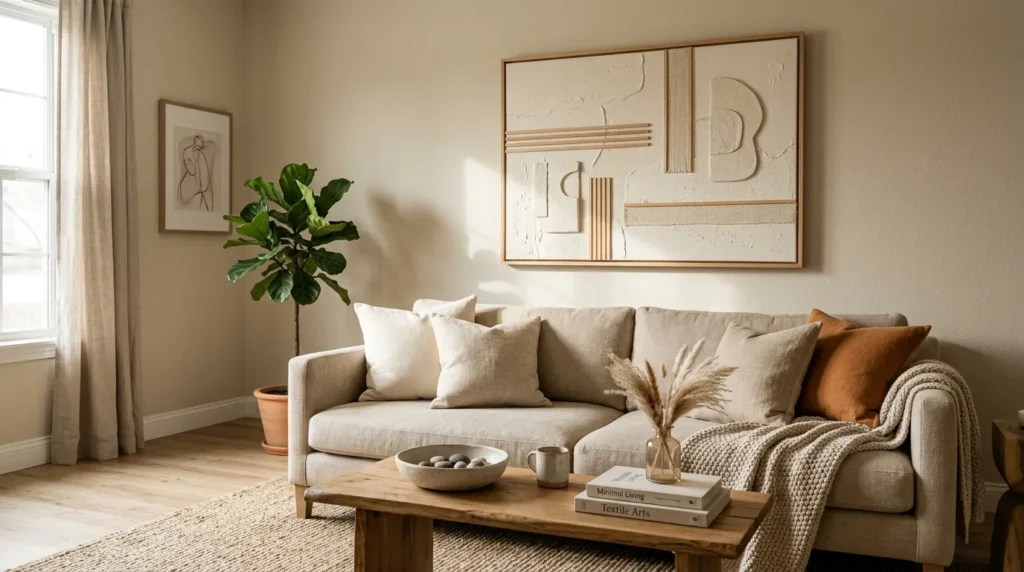
Quick Benefits
- Creates tactile visual interest
- Combines contrasting materials
- Works well with neutral interiors
- Looks handcrafted
- Makes simple designs feel richer
Why It Works
Texture can make a neutral room feel much more interesting without adding bold color. Combining canvas, wood grain, raised paint, fabric, and other tactile materials gives the artwork depth.
This is especially effective in modern organic and minimalist spaces where there may be fewer decorative objects.
The artwork becomes interesting because of how light interacts with the different surfaces.
How To Style It
Start with a neutral canvas and create a softly textured background using paint or a suitable decorative medium.
Add narrow wood pieces, thin dowels, or simple geometric shapes.
Leave some areas of the canvas untouched so the materials don’t become visually overwhelming.
Use a palette of ivory, oatmeal, beige, natural wood, and muted brown for an organic look.
A slightly uneven handmade finish can actually enhance the appeal, provided the overall composition remains intentional.
Frame the artwork if you want a more traditional appearance or mount it on a clean wood backing for a contemporary look.
10. Oversized DIY Diptych
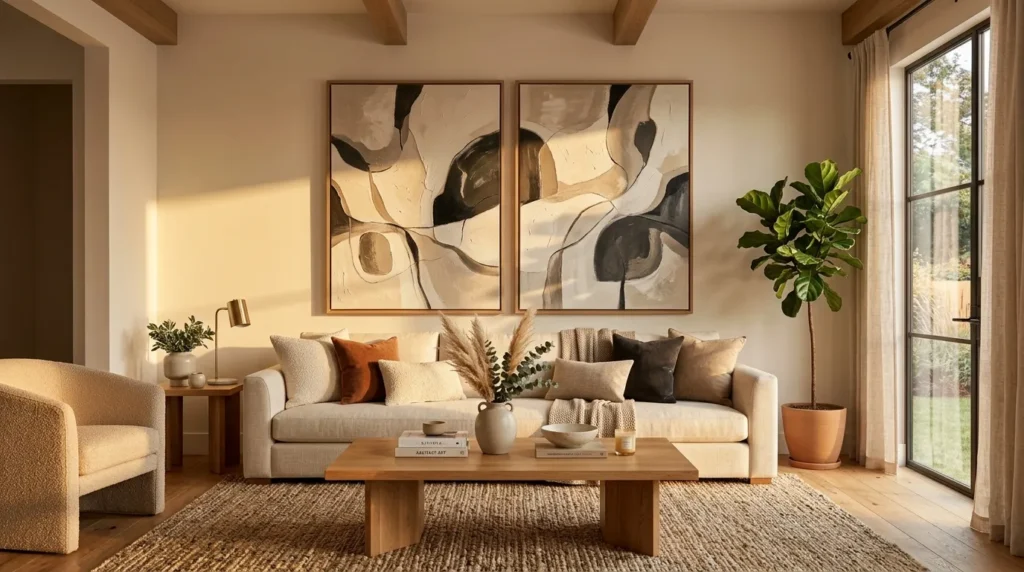
Quick Benefits
- Makes a large wall feel complete
- Creates a dramatic focal point
- Easier to handle than one enormous canvas
- Allows coordinated but imperfect designs
- Works above sofas and beds
Why It Works
A diptych is simply artwork created across two panels. It can be an excellent solution when a large wall needs substantial visual weight but one giant canvas would be difficult to make, transport, or hang.
The two pieces don’t have to be identical. They can share colors, shapes, and textures while remaining slightly different.
This creates movement across the wall and works particularly well above a wide sofa, console, bed, or dining table.
How To Style It
Choose two canvases of the same size and decide whether you want the artwork to connect visually across the center.
Paint both backgrounds in the same neutral color.
Create an abstract design that continues from one canvas to the other. Large curved brushstrokes, geometric forms, or broad color fields work well.
Add thin wood frames around each canvas for a more finished appearance.
Leave a small, consistent gap between the panels when hanging them.
Make the combined width proportional to the furniture beneath it. A diptych that is too narrow can look disconnected, while one that is too wide can dominate the room.
Frequently Asked Questions
What kind of canvas is best for DIY wall art?
Stretched cotton canvas is a versatile choice for most decorative wall art projects. It is lightweight, widely available, and works well with acrylic paint. Choose a canvas thickness and size based on the project and how you plan to frame or mount it. For dimensional projects, a sturdy stretched canvas or canvas board can provide a reliable foundation.
What type of wood is best for DIY wall art?
Pine is inexpensive and easy to work with, while poplar, oak, and other hardwoods can provide a more refined finish. Plywood and MDF can also work for painted backing boards and geometric projects. Choose wood that is straight, relatively smooth, and appropriate for the tools and finish you’re using.
How do you make DIY wall art look expensive?
Scale, simplicity, and a cohesive color palette usually make the biggest difference. Choose artwork that is appropriately sized for the wall, limit the number of colors, sand wood carefully, and use a clean frame. Natural wood, neutral colors, subtle texture, and generous negative space can make a simple handmade piece feel much more sophisticated.
Is acrylic paint good for canvas wall art?
Yes. Acrylic paint is a popular option for decorative canvas projects because it is relatively easy to use, dries quickly, and is available in many colors and finishes. Use it according to the manufacturer’s instructions and choose an appropriate surface preparation if the canvas requires one.
How do you attach wood to canvas?
The appropriate method depends on the weight and type of wood. Lightweight decorative pieces can sometimes be attached using a suitable adhesive, while heavier components may require mechanical fasteners or a supporting backing. Always follow the adhesive or hardware manufacturer’s instructions and make sure the finished artwork is securely mounted.
How big should DIY wall art be?
The ideal size depends on the wall and the furniture below it. Artwork above a sofa, bed, or console generally needs enough width and visual weight to feel connected to the furniture. For a large wall, one substantial piece or a grouping of smaller pieces often works better than a single tiny artwork floating in the middle.
Can beginners make wood and canvas wall art?
Absolutely. Many projects only require basic supplies such as canvas, wood boards, sandpaper, paint, a ruler, adhesive, and hanging hardware. Start with a framed abstract canvas or painted wood panels before moving to projects involving cutting, drilling, or more complex construction.
Conclusion
DIY wall art doesn’t have to look like a compromise. With thoughtful proportions, a simple color palette, and a few well-chosen materials, canvas and wood can become artwork that feels genuinely suited to your home.
The best part is that you can adapt almost every idea to your own space. Change the colors to coordinate with your sofa, use a warmer wood stain to complement your flooring, make the artwork larger for a spacious wall, or create several smaller pieces for a gallery arrangement.
If you’re new to DIY, start with something simple. A painted canvas inside a basic wood frame can have a surprisingly polished result. Once you’re comfortable with sanding, painting, measuring, and assembling, you can experiment with geometric shapes, layered materials, textured surfaces, and oversized designs.
Don’t worry about making the artwork perfectly symmetrical or identical to something you might find in a store. Handmade pieces often become more interesting when they show a little personality.
Before you begin, measure the wall and furniture around it, choose your palette, and decide how much visual weight the finished piece needs. Those few planning steps can prevent many common DIY decorating mistakes.
Start with one project and give yourself room to experiment. A blank canvas and a few pieces of wood can become much more than craft supplies—they can become a piece of wall decor that makes your home feel more personal.
Related Articles
- 10 DIY Wall Art Ideas for Living Room Walls
- 10 Easy DIY Home Decor Projects for Beginners
- 10 Bedroom Wall Decor Ideas That Make Your Room Stand Out
- 10 Modern Living Room Ideas You’ll Love Coming Home To
- 10 DIY Home Projects That Add Character to Any Room